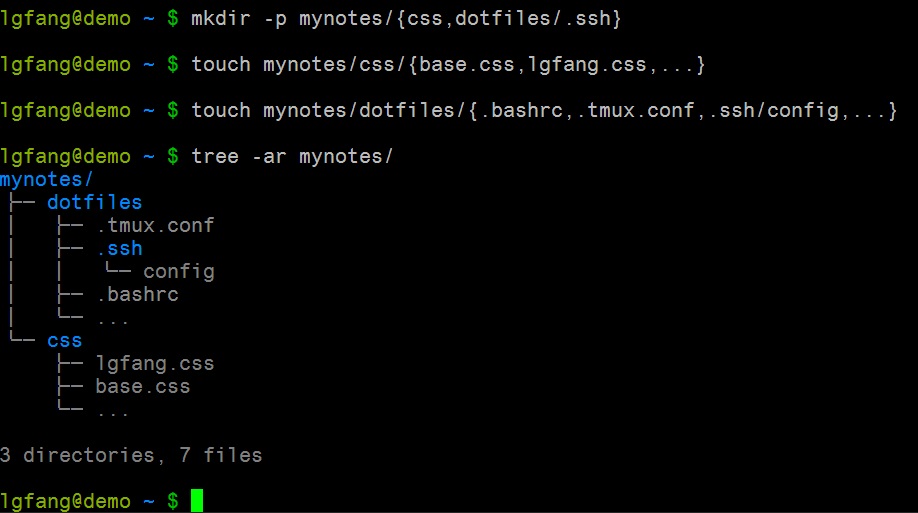
Illustrate Directory Tree

When describing a directory hierarchy, it cannot be clearer than showing others a picture like this. But to manually "draw" such an ASCII picture can be painstaking. This is true especially when doing that in "smart" editors like MS word because you have to not only type in every character yourself but also fight against the editors' intelligence as they tend to change indentations and formats for you.
Fortunately, there is a tool "tree" that can lift you out. You no longer "draw" the picture but rather create a sample hierarchy and then run "tree" to get a nice picture. Creating a directory structure can be a breeze in bash. For example, here is how I I created the directories for above picture. Quite easy, isn't it?
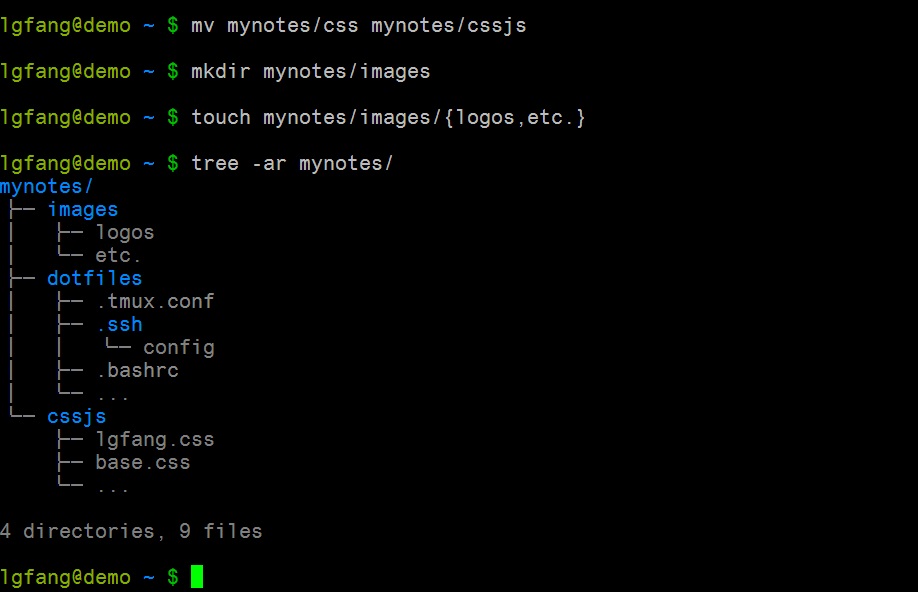
Modifying the picture is not only as easy but also very explicit. That is, the changes you make are crystal clear to your colleagues. Below is how I would propose a change. Without a single word, everyone can tell the changes I suggest as they see the commands.
One trick I used in the examples is that I created several files names of which
are literally ... and ran "tree" with options -ar so that ... are shown,
at the last of each directory.
In fact, "tree" is very handy when trying to understand source code structure. In such cases, frequently used options include:
-
-d - show directories only.
-
-L N - limit recursion depth to N.
Another thing to note is that not all linux distributions install "tree" by default. You may have to install it (say a rpm dedicated for it) before playing it.
blog comments powered by Disqus